In the last part, we have covered the Services and types of services (ClusterIP, NodePort and Load Balancer) and Ingress in Kubernetes. This part will cover Volumes, Persistent Volumes, Persistent Volume Claims and Storage Classes.
Volumes
Volume is a directory that's accessible to the containers running in the Pod
Kubernetes supports many volumes like AWS EBS, azureDisk, hostPath, emptyDir , and a pod can use as many volumes simultaneously
If one of the Pod's containers crashes or restarts, the data stored in the volume will persist
Volume allows data sharing between all the containers in a pod. It can be achieved by mounting the same volume to all the containers
Volumes are defined within the pod manifest, making volumes life cycle within the bound Pod's life cycle
In the exam, you can expect questions for creating a pod with emptyDir or hostPath configuration
Pod with emptyDir configuration volume
An emptyDir volume is first created when a Pod is assigned to a node, and exists as long as that Pod runs on that node. As the name says, the emptyDir volume is initially empty.
apiVersion: v1
kind: Pod
metadata:
  name: nginx-pod
spec:
  containers:
  - image: nginx
    name: nginx
    volumeMounts:
    - mountPath: /var/www/html
      name: website
  volumes:
  - name: website
    emptyDir: {}
Pod with hostPath configuration volume
A hostPathvolume mounts a file or directory from the host node's filesystem into your Pod. This is not something that most Pods will need, but it offers a powerful escape hatch for some applications.
apiVersion: v1
kind: Pod
metadata:
  name: nginx-pod
spec:
  containers:
  - image: nginx
    name: nginx
    volumeMounts:
    - mountPath: /var/www/html
      name: nginx
  volumes:
  - name: nginx
    hostPath:
      path: /website
      type: Directory
Persistent Volume and Persistent Volume Claims
Persistent Volume (PV)
Volumes are suitable for small environments, but managing the volumes in large environments is challenging
A Persistent Volume (PV) is a storage in the cluster that an administrator has provisioned
A Persistent Volume is a type of resource in the cluster and independent of any individual pod that uses the PV
Persistent Volumes allow us to share data between various pods in the cluster
The data in the Persistent Volumes remain even after deleting the pods
Persistent Volume Claims (PVC)
A Persistent Volume Claim or PVC is a request for storage by a user
Whenever we create a PVC, it looks for a PV of a specific size and access mode
In case of multiple PV options, we can use labels and selectors to bind to the right PV
If there's no PV available, the PVC will remain pending until the newer PVs are available in the cluster
Once the new volume is available, the PVC will automatically be bound to the newer volumes if it matches all the requested properties
After deleting the PVC, we have three options for the PV
Retain: PV will remain in the cluster until manually deleted by the administrator
Delete: PV will delete as soon as we delete the PVC
Recycle: The data in PV will delete, and PV will be available to claim by other PVCs.
Now let's create a PV and claim it by creating a PVC and then create a pod with the PVC.
PV Definition
apiVersion: v1
kind: PersistentVolume
metadata:
  name: demo-pv
  labels:
    type: local
spec:
  storageClassName: manual
  capacity:
    storage: 500Mi
  accessModes:
    - ReadWriteOnce
  hostPath:
    path: "/mnt/data"
PVC Definition
apiVersion: v1
kind: PersistentVolumeClaim
metadata:
  name: demo-pvc
spec:
  storageClassName: manual
  accessModes:
    - ReadWriteOnce
  resources:
    requests:
      storage: 300Mi
Pod Definition
apiVersion: v1
kind: Pod
metadata:
  name: demo-pod
spec:
  containers:
    - name: nginx
      image: nginx
      volumeMounts:
      - mountPath: "/var/www/html"
        name: demo-volume
  volumes:
    - name: demo-volume
      persistentVolumeClaim:
        claimName: demo-pvc
Commands to run:
- Create a Persistent Volume and check the status
kubectl apply -f pv.yaml
kubectl get pv

Here you can see that the PV is created and it's available to claim.
- Create a Persistent Volume Claims and check the status
kubectl apply -f pvc.yaml
kubectl get pvc

After creating the PVC the status of PV will changed to Bound.
- Create a Pod with PVC and check the status
kubectl apply -f pod.yaml
kubectl get pod
kubectl get pvc

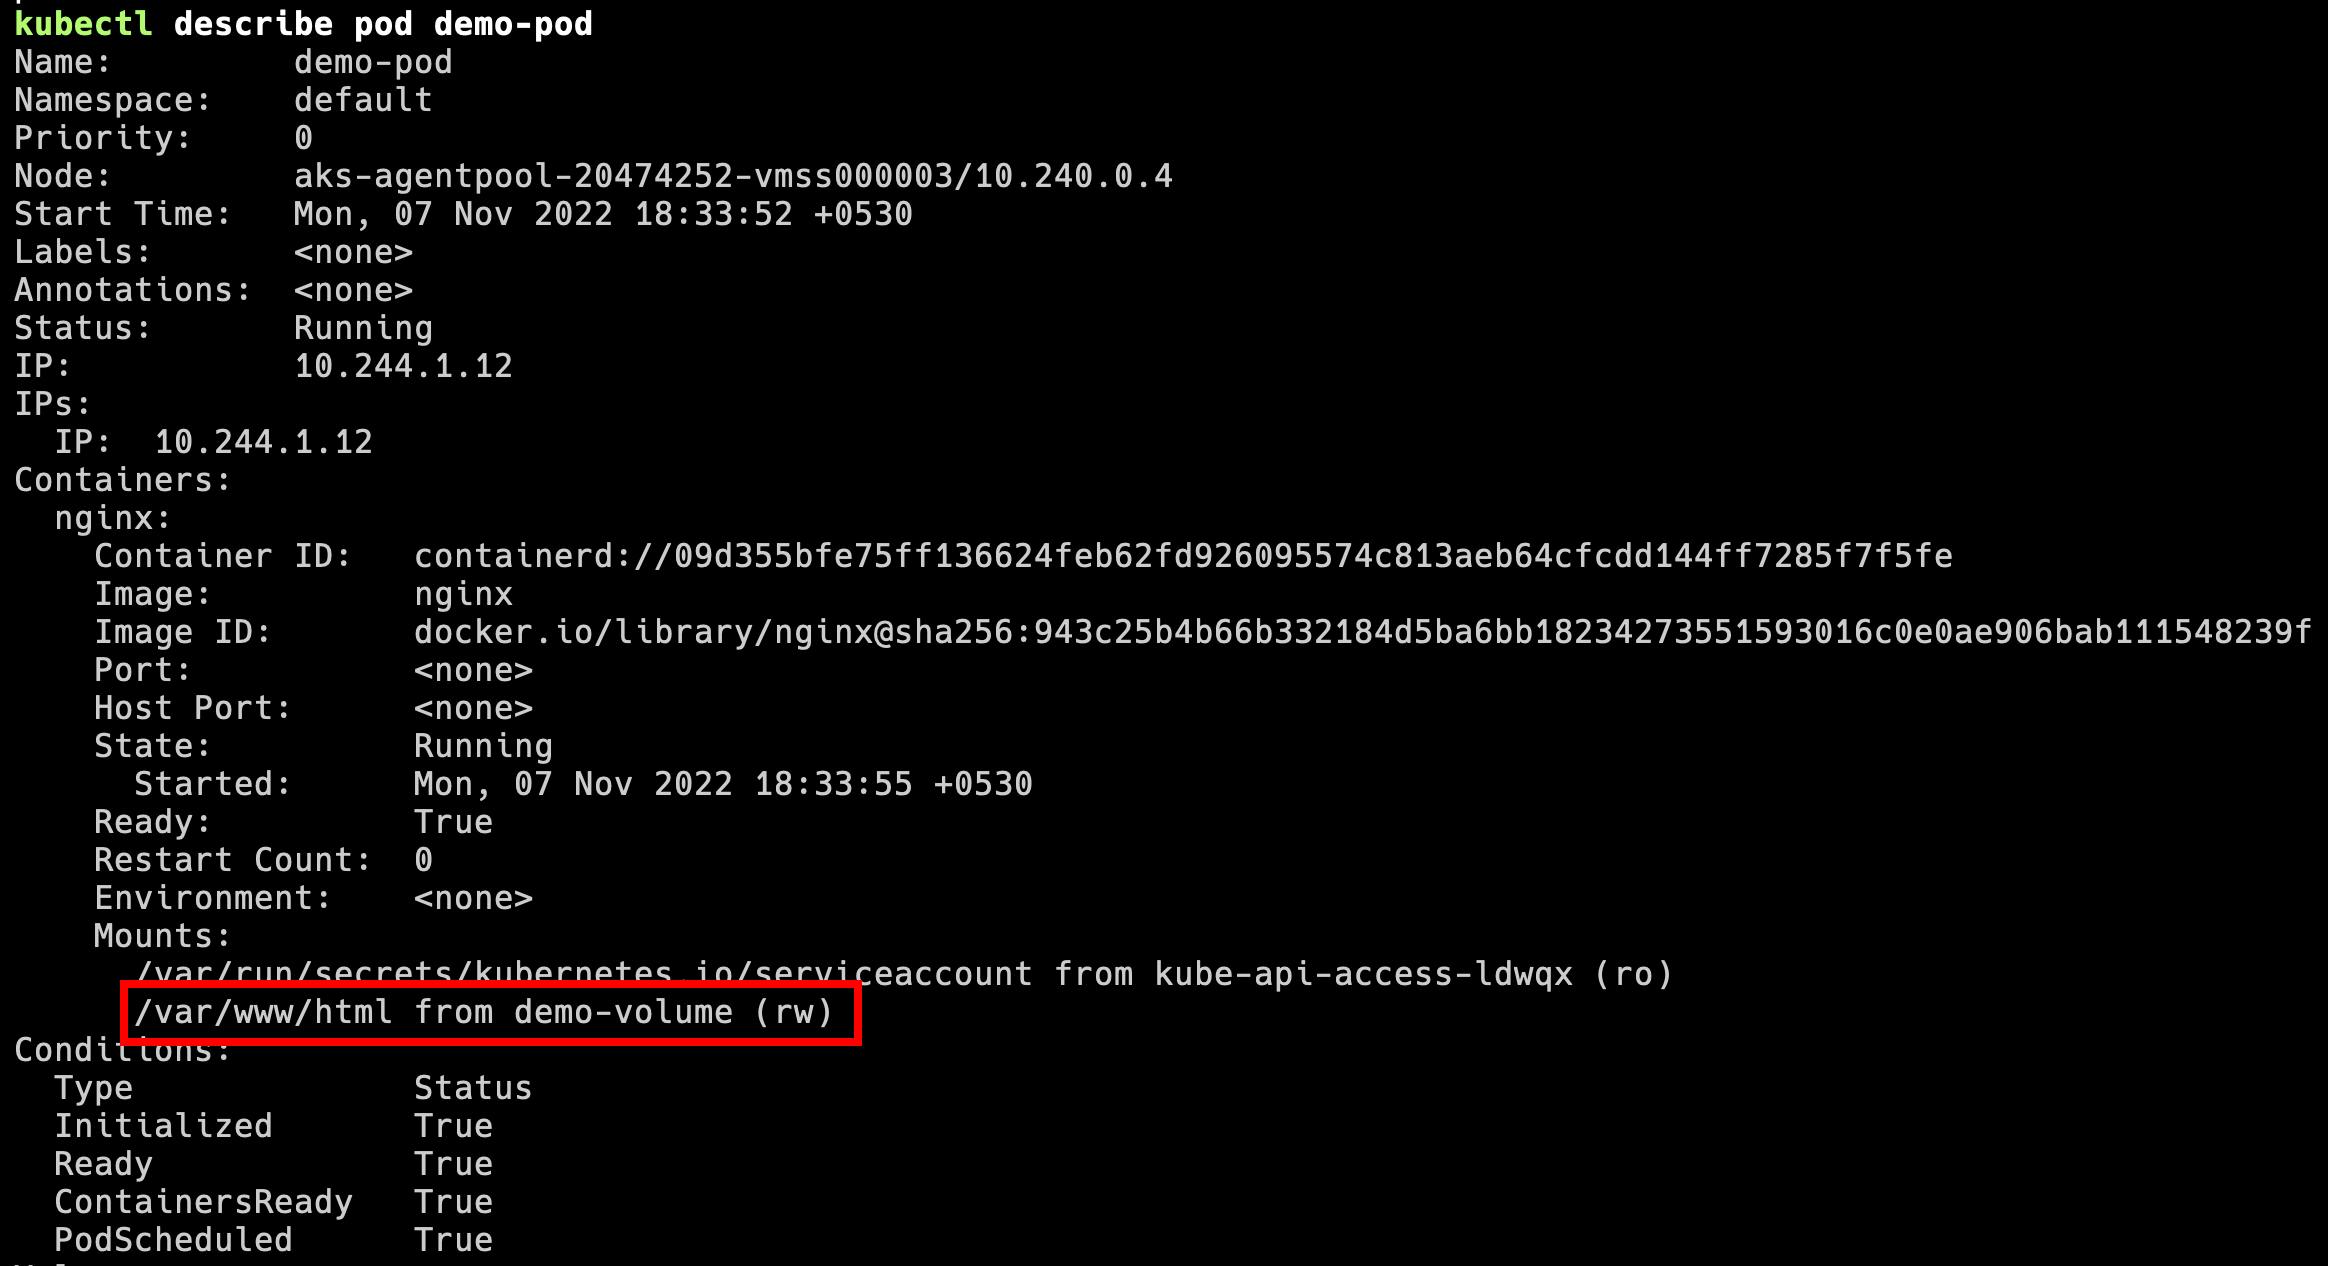
Run describe command for the Pod to see the volume

Storage Classes
Managing multiple PVs can be challenging as it involves first provisioning a disk from the cloud provider and then creating a PV definition. This is called Static Provisioning
With Storage Class, we can define a provisioner, such as AWS EBS or Google Storage, that automatically provisions the storage and attach to Pod whenever the claim is made. This is called Dynamic Provisioning
While using the Storage Class, we don't need to provision the PVs. The Storage Class will automatically create PVs
We just have to add an attribute
storageClassNamein the Pod definitionStorage Class can have various provider-specific parameters like disk types, replication modes, region etc.
Storage Class definition for AWS EBS
apiVersion: storage.k8s.io/v1
kind: StorageClass
metadata:
  name: ebs-storage-class
provisioner: kubernetes.io/aws-ebs
parameters:
  type: io1
  iopsPerGB: "10"
  fsType: ext4
Pod definition with Storage Class volume
apiVersion: v1
kind: Pod
metadata:
  name: pod-with-ebs
spec:
  volumes:
    - name: ebs-volume
      persistentVolumeClaim:
        claimName: ebs-storage-class
  containers:
    - name: pod-with-ebs
      image: nginx
      ports:
        - containerPort: 80
          name: "http-server"
      volumeMounts:
        - mountPath: "/usr/share/nginx/html"
          name: ebs-volume
Practice Question
- Create a Pod with redis image. Add a
hostPathvolume with the following configuration.
mountPath: /var/redis-data
path: redis-data
- Create a PV in ReadWriteMany mode with
hostPath/var/pv-data and capacity 2Gi. Now create PVC to claim 1Gi of storage. At last, create a pod with aredisimage, that uses the PVC for volume and mounts on/var/data.
That's all for this part, and In the next part, I will share study material for all the new topics CNCF added in the exam after September 2021, etc.

To be Continued..!!

