

CKAD exam Preparation Notes - Pod Configuration, Multi-Container Pods and Init Containers - Part 3


In the last part, we have covered the Commands and Arguments, Environment Variables, ConfigMaps, Secrets, and Security Context. This part will cover Resource Requirements, Service Accounts, Taints and Tolerations, Node Affinity, Multi-Container Pods, and Init-Containers in Kubernetes.
Resource Requirements
While creating a pod, we can optionally specify the resources required for each container.
The most common resources are CPU and memory(RAM).
The Pod consumes the resources from the node where it’s placed.
The scheduler holds back from scheduling the Pod if there’s no sufficient resource available on any node.
Kubernetes throttles the CPU pod and tries to exceed its limits.
The Pod will be terminated if the Pod tries to exceed the memory limit.
Working with Resources
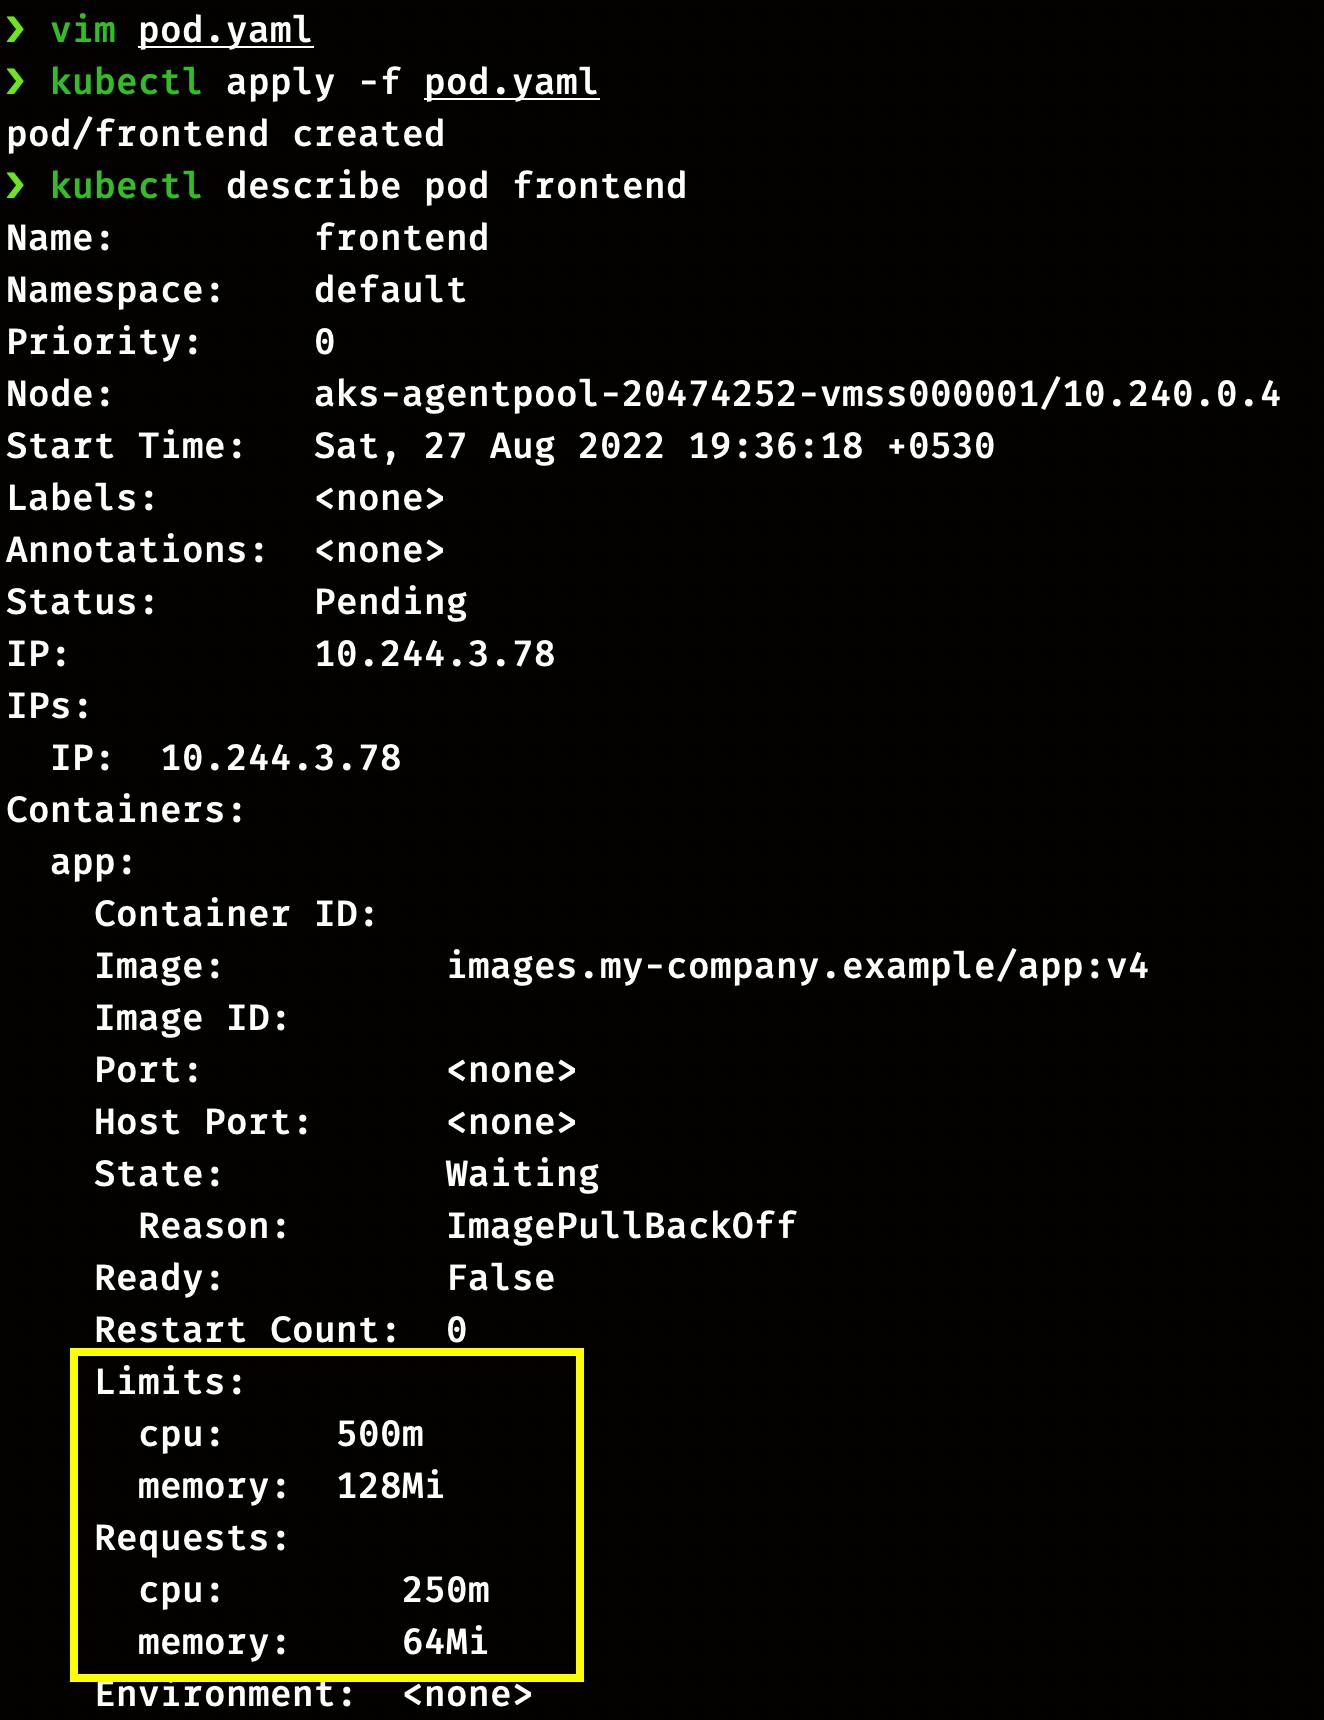
We can specify the resource limit in the Pod by using the resources attributes. Here Pod has a limit of 0.5 CPU and 128MiB of memory. You can say the Pod has a request of 0.5 CPU and 128 MiB of memory and a limit of 1 CPU and 256MiB of memory.
apiVersion: v1
kind: Pod
metadata:
  name: frontend
spec:
  containers:
  - name: app
    image: images.my-company.example/app:v4
    resources:
      requests:
        memory: "64Mi"
        cpu: "250m"
      limits:
        memory: "128Mi"
        cpu: "500m"
You can see the pod description in the screenshot below
Service Accounts
There are two types of accounts in Kubernetes, a User account and a Service account.
Users (admins or developers) use user accounts to access the cluster. Similarly, Service accounts are used by services or processes (Like Prometheus) inside the Pods to access the cluster.
Whenever we create a service account, it automatically creates a token. This token is stored as a secret object in the cluster.
This service account token must be used by external services to authenticate the API server.
If a Third-party application or service is hosted on the same Kubernetes cluster, then we can mount the secret as the volume inside the pod, hosting the third-party service.
By default, every namespace in the cluster has a Service account named default. Whenever a pod is created, The default Service account and token are automatically mounted whenever a pod is created.
The default service account has basic permissions to run the Kubernetes API queries.
We can’t edit the service account of the existing en pod; however, in case of Deployments, we can change the service account in the deployment definition, and deployment will trigger the new pods with the new service account.
Creating and Assigning Custom Service Accounts
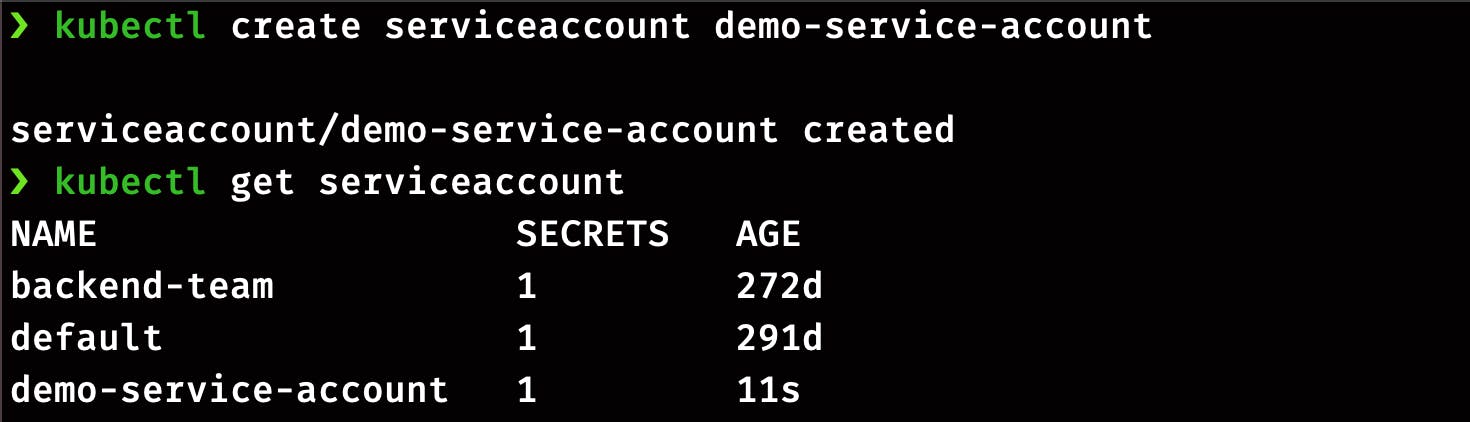
The create command can create a service account:
kubectl create serviceaccount demo-service-account

OR

kubectl create sa demo-service-account
List the service account
kubectl get serviceaccount
kubectl get sa
You can use a YAML manifest and add the serviceAccountName attribute or the imperative command to attach the service account when creating the pod.
Let's do it by editing the YAML manifest. Create a definition file with the following command:
kubectl run demo-pod --image=nginx -o yaml --dry-run=client > demo-pod.yaml
Now edit the definition demo-pod.yaml to add the serviceAccountName attribute.
apiVersion: v1
kind: Pod
metadata:
  creationTimestamp: null
  labels:
    run: demo-pod
  name: demo-pod
spec:
  serviceAccountName: demo-service-account
  containers:
  - image: nginx
    name: demo-pod
    resources: {}
  dnsPolicy: ClusterFirst
  restartPolicy: Always
status: {}
Apply the definition and check describe the pod to see the service account.
kubectl apply -f demo-pod.yaml
kubectl get pods
kubectl describe pod demo-pod
Similarly you can attach a definition to pod by using --serviceAccount flag in the run command.
kubectl run demo-pod-1 --image=nginx --serviceaccount=demo-service-account
Assigning rules to a service account via Role-Based Access Control (RBAC) to authorise the specific resources and actions is out of the scope of the CKAD exam. But if you want to learn more, refer to the following documentation.
Taints and Toleration
Taints are applied to the nodes, allowing the node to repel the set of pods.
Tolerations are applied on the pod to allow the scheduler to schedule the pods with matching taints.
Taints and Toleration work together to ensure pods are not scheduled onto inappropriate nodes.
One or more taints are applied to a node; this marks that the node should not accept any pods that do not tolerate the taints.
There are three main effects of Taints;
NoSchedule: Restricts scheduler to schedule a Pod on the Node.
PreferNoSchedule: The scheduler will try to avoid placing the pod onto the Node, but that's not guaranteed.
NoExecute: No pod will be scheduled on the Node, and existing pods without toleration will be evicted.
Working with Taint and Toleration
Taints can be applied to the nodes by following command format:
kubectl taint nodes node-name key=value:taint-effect
Here taint effect can be NoSchedule, PreferNoSchedule or NoExecute.
Now lets taint our node with key=color , value=blue and NoSchedule taint-effect.
kubectl taint nodes aks-agentpool-xxxxxxxxxx color=blue:NoSchedule
Check the Taint on Node
kubectl describe node aks-agentpool-xxxxxxxxxx | grep Taints

Now create a pod demo-pod and check it’s status
kubectl run demo-pod --image=nginx
kubectl get pods
You can see the pod is in pending state because we have a tainted node. Now delete the pod demo-pod and create a new pod with the following definition.
apiVersion: v1
kind: Pod
metadata:
  name: demo-pod
spec:
  containers:
  - name: demo-pod
    image: nginx
  tolerations:
  - key: "colorr"
    operator: "Exists"
In this definition, you can see that we have added the toleration attribute in the spec section.
kubectl apply -f demo-pod.yaml
kubectl get pods -o wide

You can see that the pod is now scheduled successfully on the tainted Node.
Removing the Taint
Taint can be removed by this command:
kubectl taint nodes aks-agentpool-xxxxxxxxxx color=blue:NoSchedule-
kubectl describe node aks-agentpool-xxxxxxxxxx | grep Taints

Node Selector
Node selectors are the easiest way to schedule a pod on a specific node.
You can put an attribute nodeSelector in the pod definition and specify the node labels of the target node.
Kubernetes only schedules the Pod onto nodes with each label you specify.
Working with Node Selector
Before going to the Pod definition, let's add a label with key size and value medium on the Node.
kubectl label node aks-agentpool-xxxxxxxxxx size=medium
Now create a pod with following definition
apiVersion: v1
kind: Pod
metadata:
  name: demo-pod
spec:
  containers:
  - name: demo-pod
    image: nginx
  nodeSelector:
    size: medium
Now check the status of pod.
kubectl get pod -o wide

Node Affinity
Node Selector is the easiest way to schedule the Pod on any particular node, but it doesn't provide advanced expressions like OR or NOT.
With node affinity, you can select more than one Node while creating the Pod.
Types of Node Affinity:
requiredDuringSchedulingIgnoredDuringExecution: Scheduler will not schedule the Pod unless the rule is met.
preferredDuringSchedulingIgnoredDuringExecution: Schedule tries to find the Node with matching labels. If a matching node is unavailable, the Pod will be scheduled on another node.
Working with Node Affinity:
Before working on the pod definition, let's label the Node with key size and value medium.
kubectl label node aks-agentpool-xxxxxxxxxx size=medium
Now create a pod definition with node affinity type requiredDuringSchedulingIgnoredDuringExecution and select expression large.
apiVersion: v1
kind: Pod
metadata:
  name: node-affinity
spec:
  affinity:
    nodeAffinity:
      requiredDuringSchedulingIgnoredDuringExecution:
        nodeSelectorTerms:
        - matchExpressions:
          - key: size
            operator: In
            values:
            - large
  containers:
  - name: node-affinity
    image: nginx
Check the status of Pod
kubectl get pod -o wide

Here you can see the pod status is pending because we don't have a node with large label. Delete the Pod and change the value to medium from large.
apiVersion: v1
kind: Pod
metadata:
  name: node-affinity
spec:
  affinity:
    nodeAffinity:
      requiredDuringSchedulingIgnoredDuringExecution:
        nodeSelectorTerms:
        - matchExpressions:
          - key: size
            operator: In
            values:
            - medium
  containers:
  - name: node-affinity
    image: nginx
Again create the pod and check the status.
kubectl get pods -o wide
Now you can see that the pods are created.

Multi-Container Pods
The objective of a multi-container pod is to run two services (web server and logging service) together. To achieve this, we can put an agent container in the same Pod where the web server is running.
Multi-Container pods share the same life cycle, which means there are created together and destroyed together. They also share the same network and can access each other as local hosts. Multi-Container pods share the same volume as well.
Patterns of Multi-Container Pods:
Sidecar: In this pattern, we run a sidecar container alongside the app to provide services like logging or monitoring.
Adapter: This type of container is used to transform the output of the main container. For example, converting the access logs into a specific format before sending them to the analytics service.
Ambassador: Ambassador container is used to change the network connection of the main container. For example, changing the connection to the database based on the environment.
Working with Multi-Container Pod:
We can create a multi-container pod by adding the attributes of extra containers in the containers section. Here I'm creating a pod definition with nginx and redis containers.
apiVersion: v1
kind: Pod
metadata:
  creationTimestamp: null
  labels:
    run: multi-container-pod
  name: multi-container-pod
spec:
  containers:
  - image: nginx
    name: nginx
    resources: {}
  - image: redis
    name: redis
    resources: {}
  dnsPolicy: ClusterFirst
  restartPolicy: Always
status: {}
Create Pod and check the status of containers in the Pod
kubectl get pods
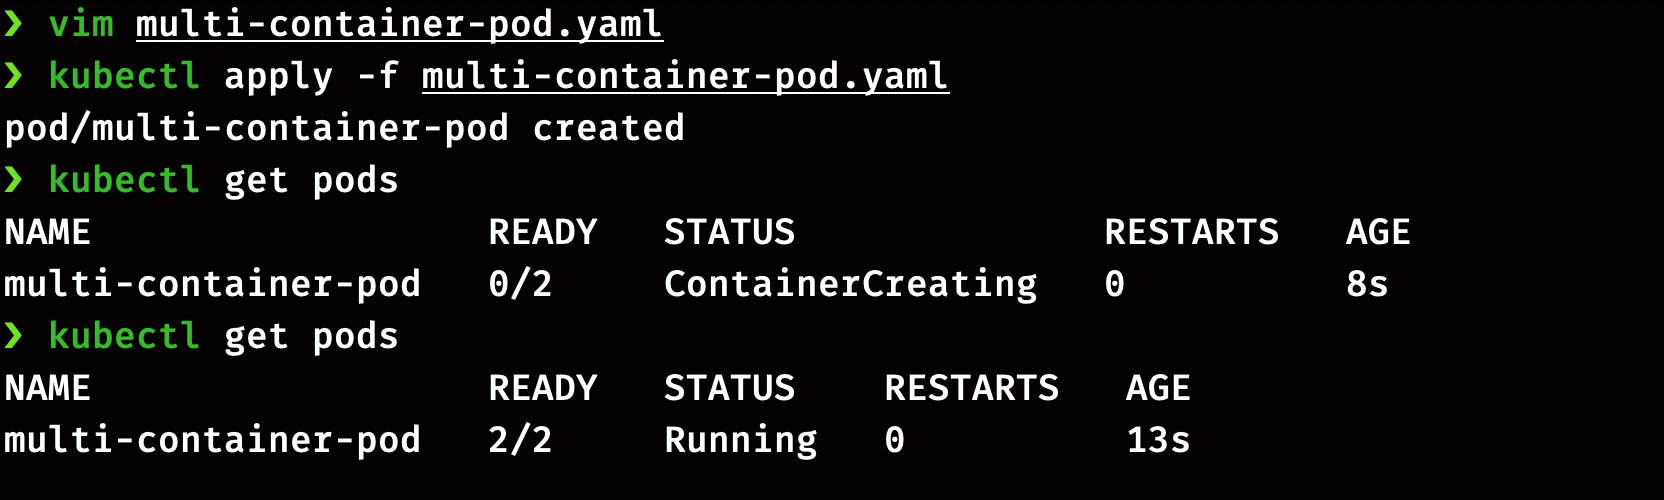
Here you can see that both the containers in pods are up and running.
Init Containers
Sometimes we may want to run a process and start the application after the completion of the process. For example, pulling the code from the git repo that the main application will use.
This can be achieved by initContainer as it runs before the main application container, which means they have their own lifecycle.
There can be multiple initContainers in the Pod to distribute the startup task of the application.
If any initContainer fails, the Pod will restart, and all the initContainers will run again in sequential order.
Working with initContainer
The pod definition of initContainers looks similar to a multi-pod container. The only difference is we now have a separate section for initContainer. In this demo, we will create a pod with nginx as the main container and busybox as initContainer.
apiVersion: v1
kind: Pod
metadata:
  name: init-demo
  labels:
    app: myapp
spec:
  containers:
  - name: app-cintainer
    image: nginx
  initContainers:
  - name: init-service
    image: busybox
    command: ['sh', '-c', 'echo this is init container']
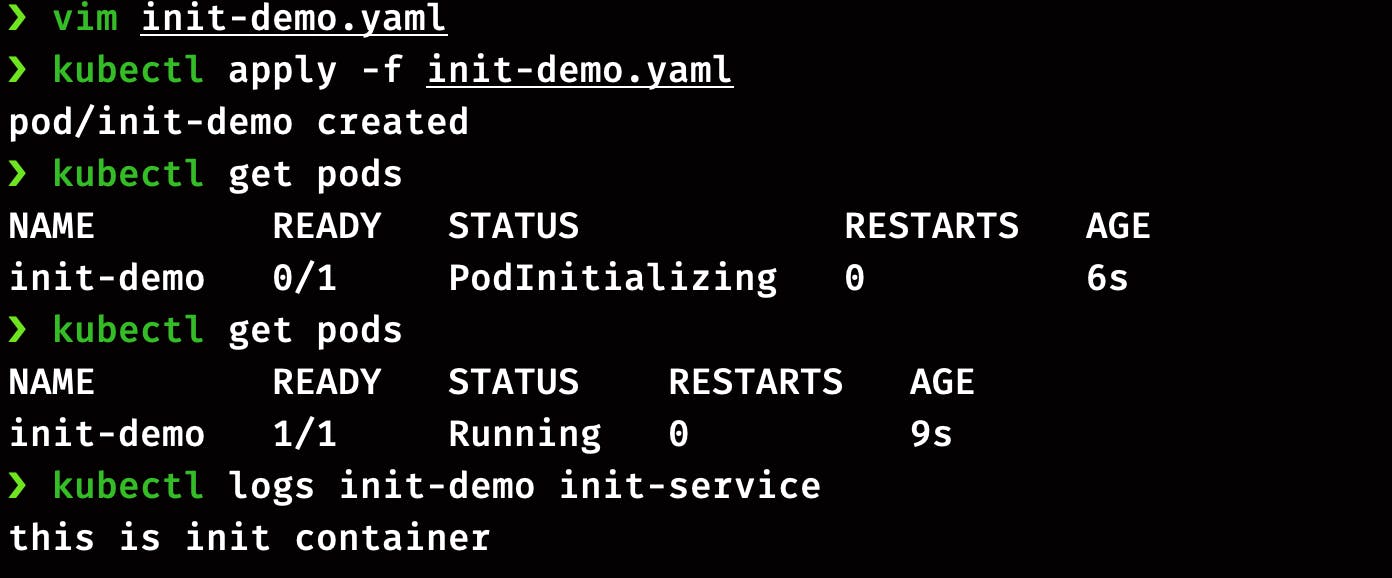
Here you can the logs of initContainer.
Practice Questions
Create a pod with a resource limit of 512 CPU and 1 GiB memory.
Create a service account, my-service and assign it to a pod my-pod running with Redis image.
Taint node with
key=sizeandvalue=smallwith NoSchedule taint-effect. Now create a pod and ensure it's running in the same node.Label your primary node with
size=largeand create a pod with node affinity typerequiredDuringSchedulingIgnoredDuringExecution.Create a multi-container pod with
nginxandbusyboxcontainers.Create a pod with two containers. First will be an initContainer that will use the busybox image and execute the shell command
sleep 1200. For another container, use the Nginx image.
That’s all for this part, and In the next part, we will cover topics like Readiness Probes, Liveness Probe, Logging and Monitoring, etc.
To be continued..!!